Go Back
No-Bake Oreo Cheesecake Cups

No-Bake Oreo Cheesecake Cups

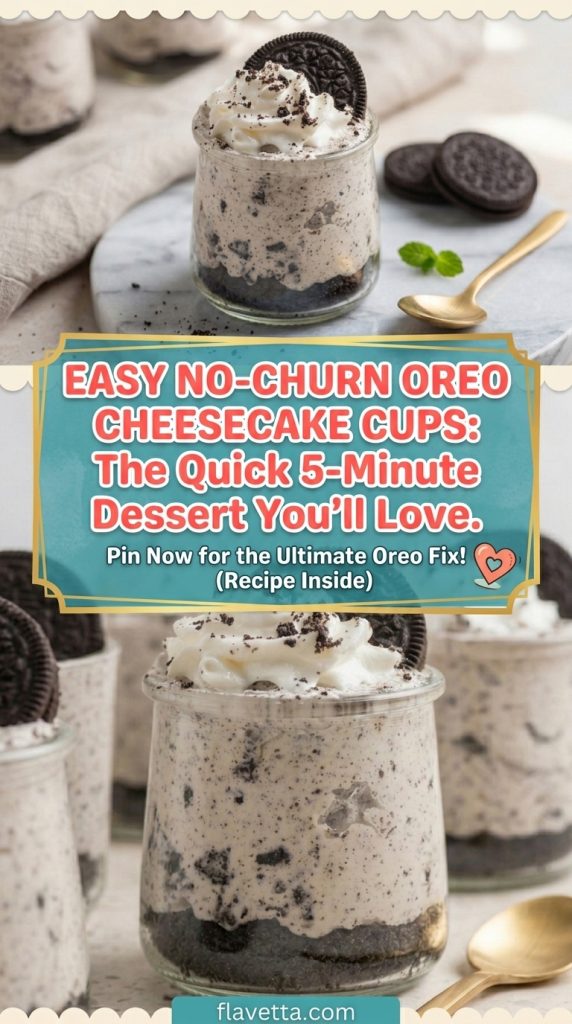
These no-bake Oreo cheesecake cups are the ultimate quick and creamy dessert for any occasion. Made with simple ingredients and ready in just 20 minutes, they deliver rich cheesecake flavor layered with crunchy Oreo goodness. Each bite is smooth, sweet, and perfectly indulgent without needing an oven. Ideal for summer gatherings, last-minute treats, or whenever a dessert craving hits, these individual cups are both fun and convenient to serve. Customize them with extra toppings like whipped cream or chocolate drizzle for an extra special touch. Easy, delicious, and guaranteed to impress, this dessert is one you’ll make again and again.
Prep Time 20 minutes
Cook Time 0 minutes
Course: Dessert, Snack, Summer Dessert
Cuisine: American

Ingredients
  

  • Ingredients You’ll Need
  • 1 8 oz package cream cheese, softened to room temperature
  • 1 8 oz tub whipped topping (like Cool Whip), thawed
  • 2/3 cup powdered sugar
  • 1 teaspoon vanilla extract
  • 24 –26 Oreo cookies plus extra for topping, optional

Method
 

Step 1: Crush the Cookies

Place the Oreos in a sealed zip-top bag. Use a rolling pin or heavy spoon to crush them into small chunks (not too fine—some texture is key!).

    Step 2: Build the Base

    Spoon about 1½ to 2 tablespoons of crushed Oreos into the bottom of each serving cup (6 small cups, about ¾–1 cup size). Set aside.

      Step 3: Make the Cheesecake Filling

      In a mixing bowl, beat the softened cream cheese with powdered sugar until smooth and creamy. Add vanilla extract and mix again until combined.

        Step 4: Fold in the Fluff

        Gently fold in the whipped topping using a spatula. Take your time here—don’t overmix or you’ll lose that light, airy texture.

          Step 5: Add Oreo Crunch

          Fold in the remaining crushed Oreos, distributing them evenly through the filling.

            Step 6: Assemble the Cups

            Spoon the cheesecake mixture evenly over the Oreo base in each cup. Lightly press down to create a smooth layer.

              Step 7: Chill & Set

              Refrigerate for at least 1 hour before serving. This helps the texture firm up beautifully.

                Step 8: Finish & Serve

                Top with whipped cream and extra crushed Oreos right before serving. Done and delicious.
                  Notes

                  Serving Suggestions (Make It Extra Fun)

                  • Add a drizzle of chocolate or caramel sauce for a bakery-style finish
                  • Layer in a few whole Oreo halves for a dramatic look
                  • Serve in clear cups or jars to show off those creamy layers
                  • Pair with fresh berries for a slight contrast (FYI, it works!)

                  Expert Tips for Best Results

                  • Use room temperature cream cheese to avoid lumps
                  • Fold, don’t beat, when adding whipped topping to keep it fluffy
                  • Want cleaner layers? Use a piping bag to fill the cups
                  • Chill longer for thicker texture—2 hours is even better

                  Storage & Freezing Guide

                  • Store covered in the refrigerator for up to 5 days
                  • Use airtight containers or wrap cups tightly with plastic wrap + foil
                  • Cookies will soften over time (still tasty, just less crunchy)
                  Freezing option:
                  • Freeze tightly wrapped for best results
                  • Thaw overnight in the fridge before serving

                  FAQs

                  Can I use homemade whipped cream instead of Cool Whip?
                   Yes! Just make sure it’s whipped to stiff peaks for stability.
                  Can I make these ahead of time?
                   Absolutely. They’re even better after a few hours in the fridge.
                  Can I use different cookies?
                   Totally. Try chocolate sandwich cookies, golden Oreos, or even brownies.
                  How do I make them less sweet?
                   Reduce the powdered sugar slightly or use less Oreo in the filling.

                  Final Thoughts

                  These no-bake Oreo cheesecake cups are proof that simple desserts can still steal the show. No oven, no complicated steps—just creamy, crunchy, sweet perfection layered into every bite.
                  They’re quick, flexible, and honestly hard to mess up. Whether you’re making them for a party or just a late-night craving, they always deliver.
                  Make once… and don’t be surprised when everyone asks for the recipe.
                  No-Bake Oreo Cheesecake Cups - 3 Thumbnail